How to Convert Microsoft Outlook IMAP to POP3 Account? Explained
IMAP account is difficult to manage because many hosts do not support the IMAP Protocol. In IMAP account users face a slow speed to access emails rather than POP3 accounts. POP3 emails are operating rapidly. IMAP mail account messages are available when you are connected to the internet. The main drawback of the IMAP email account is it mostly email server does not work with it so most users give preference to the POP3 mail service.
If you are using an IMAP account and want to switch from IMAP to POP3 account then, here is an easy way for it.
You are needed to complete three processes:
- Add your POP3 account in Outlook
- Transfer Emails Folder from IMAP to POP3
- Remove IMAP account from Outlook
How to Add POP3 Emails Account in Outlook?
With the help of a few easy steps, you will easily add a POP3 account in Outlook. Here describe the steps for Outlook 2007 and 2010.
Steps for How to add POP3 account in MS Outlook 2007
Step 1
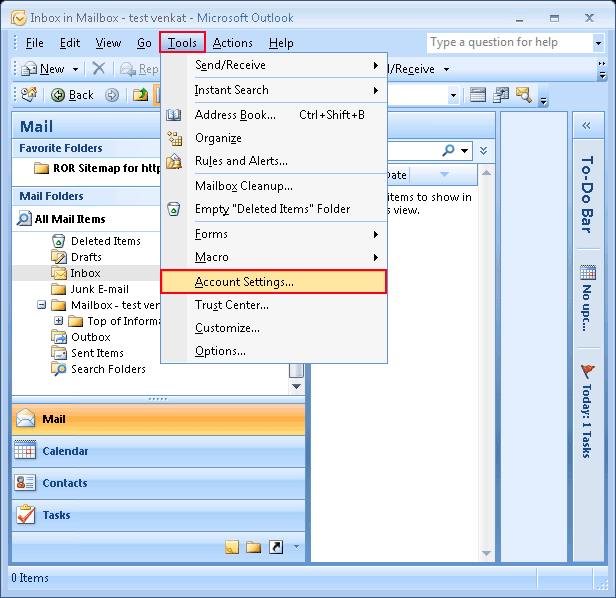
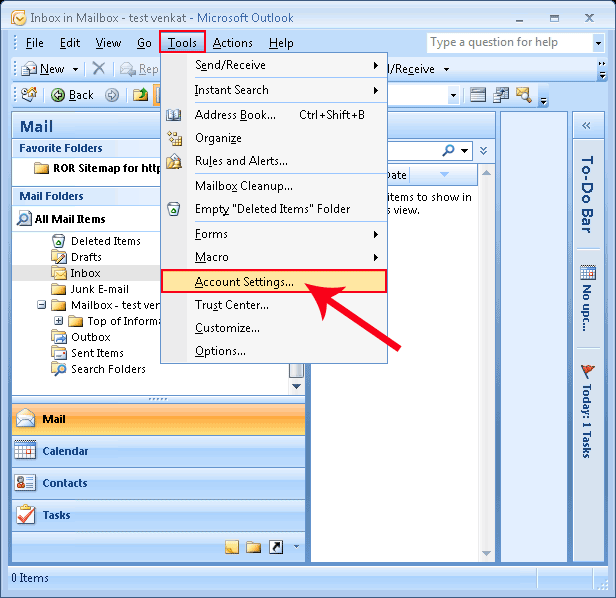
- Select the “Tools tab” and click on the “Account Settings” button.
Step 2
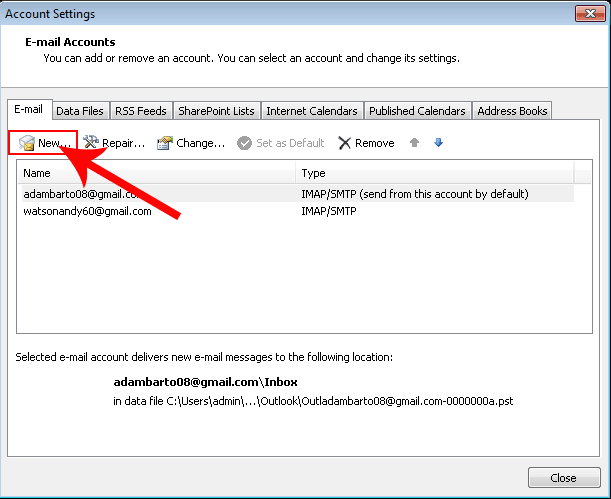
- Now click on “New” to add a POP3 account in Outlook.
Step 3
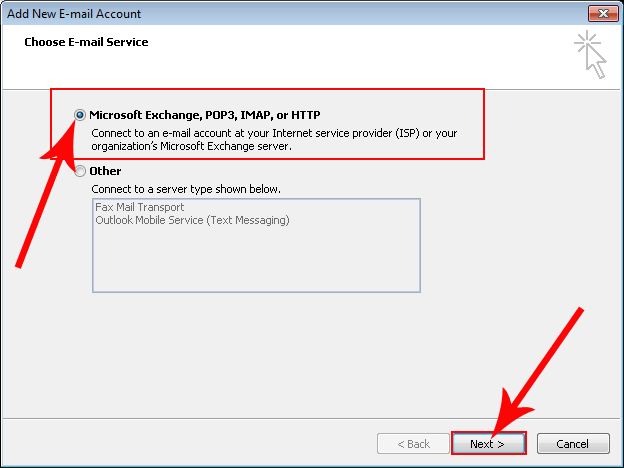
- After that select the first option to add a POP3 account and click on the “Next” button.
Step 4
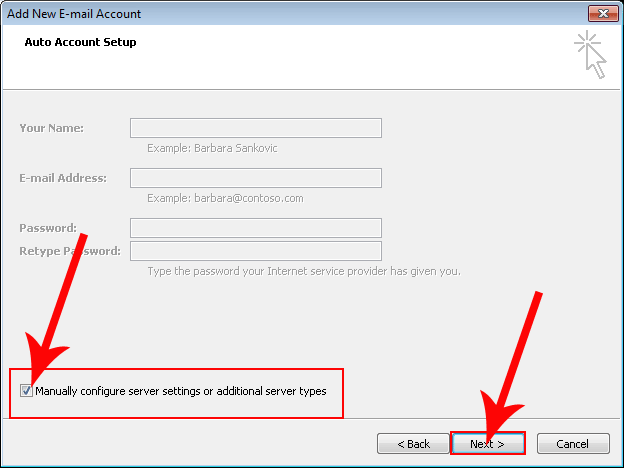
- Select the “Manually Configure Server Settings or Additional Server Types” and click on the “Next” button.
Step 5
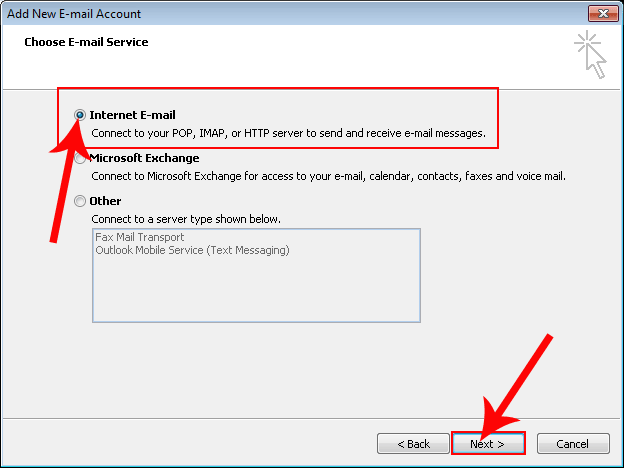
- After that select, the first option of “Internet Email” to add a POP3 account in MS Outlook. Now click on the “Next” button.
Step 6
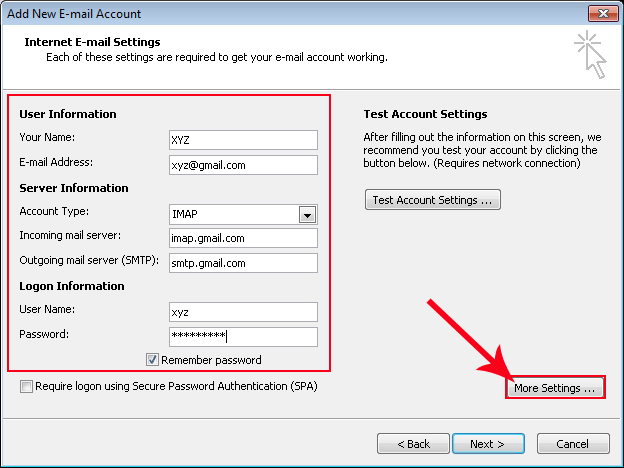
- Here fill in all information like “USER Information“, “Server Information” and “Login Information“. After that Click on the “More Settings” Options.
Step 7
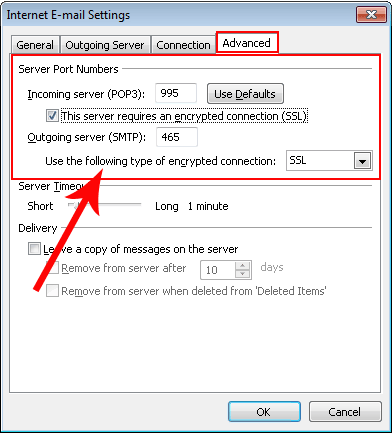
- After clicking on the “more settings” button pop up this window here. Now select the “advanced” tab and set the server port number.
Step 8
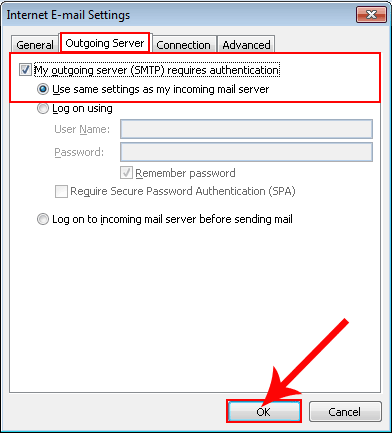
- After that select the “Outgoing server” tab and select the first option and click on the “Ok” button.
Step 9
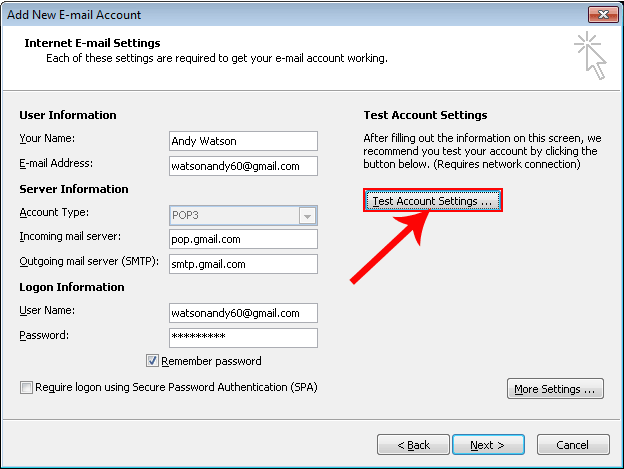
- Now Click on “Test Account Settings” to checkout account settings.
Step 10
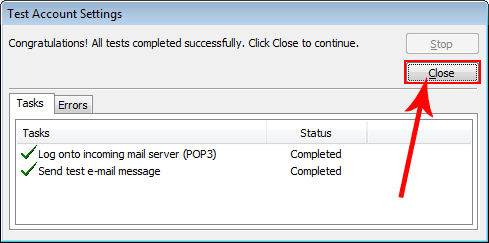
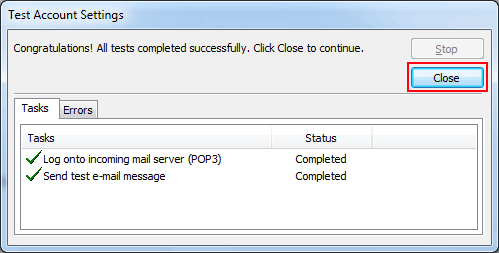
- When the testing process is complete then a congratulation window pop-up and now you will need to click on the “Close” button.
Step 11
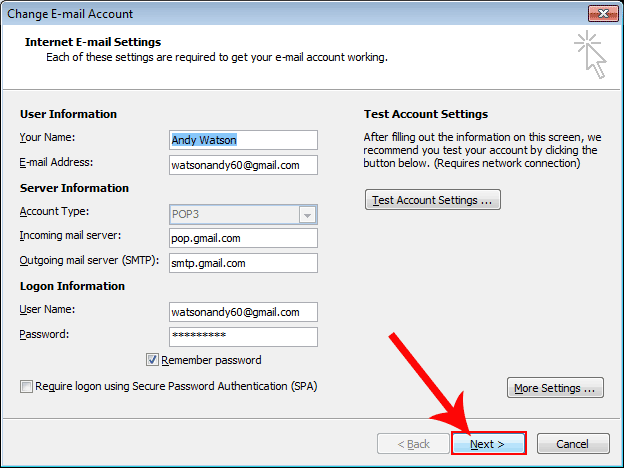
- After that click on the “Next” button.
Step 12
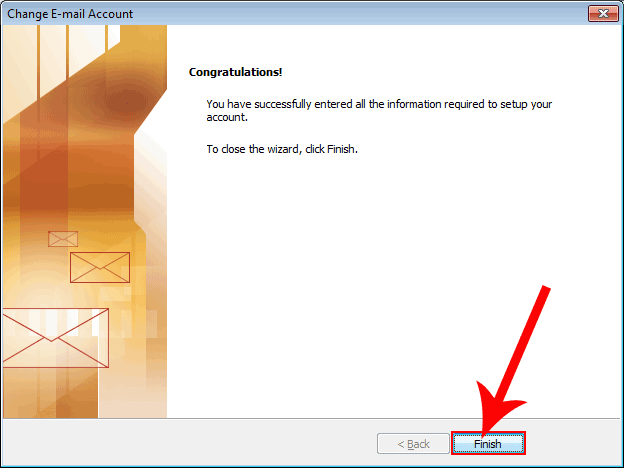
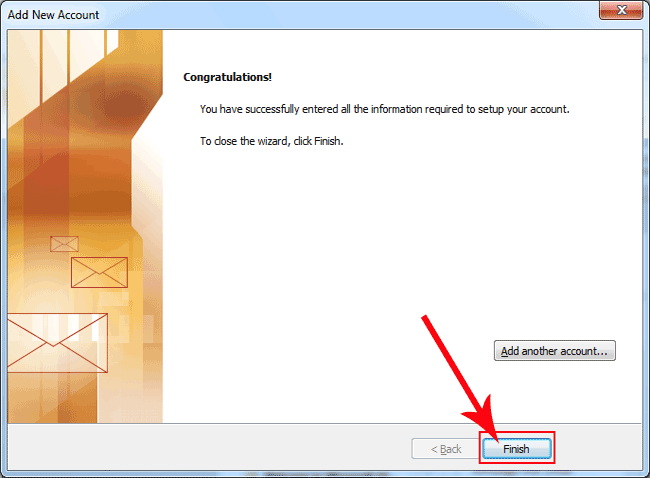
- After that, you will need to click on the “finish” button and your pop account add-in MS Outlook 2007.
Steps for How to add POP3 account in MS Outlook 2010
Step 1
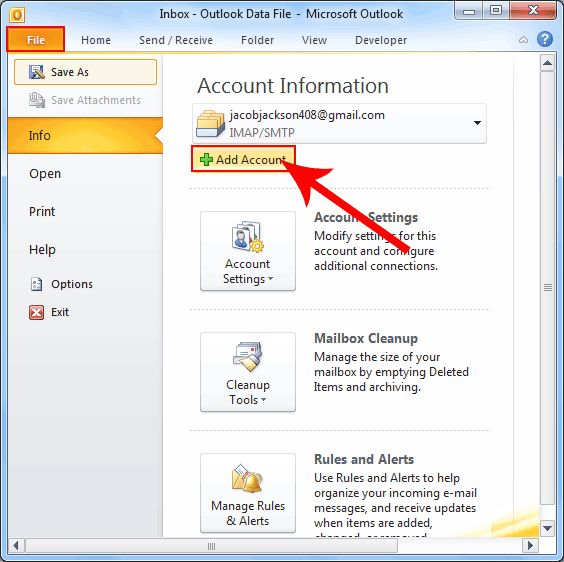
- Select the File Tab and Click on the “Add Account” button.
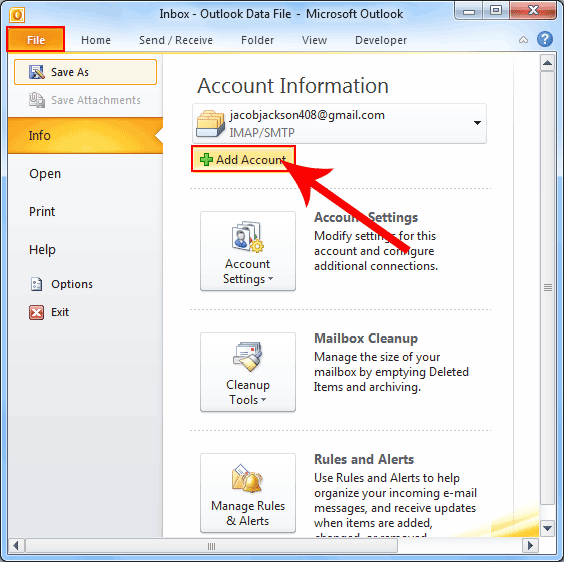
Step 2
- After that, this window Pop-up and here select the manually configure Server setting option. Now click on the “Next” button.
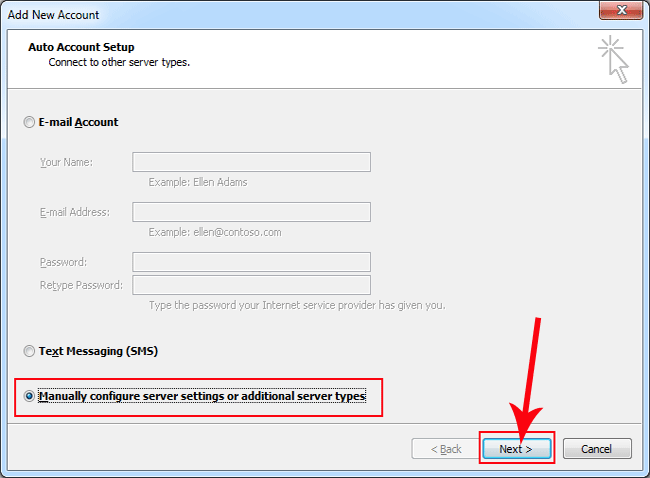
Step 3
- Here are four options to choose service. 1st is Internet E-mail, 2nd is Microsoft Exchange or Compatible service, 3rd is Text Messaging (SMS) and 4th is other. But we want to add a POP3 account in outlook so we have to select the “first option” and click on the “Next” button.
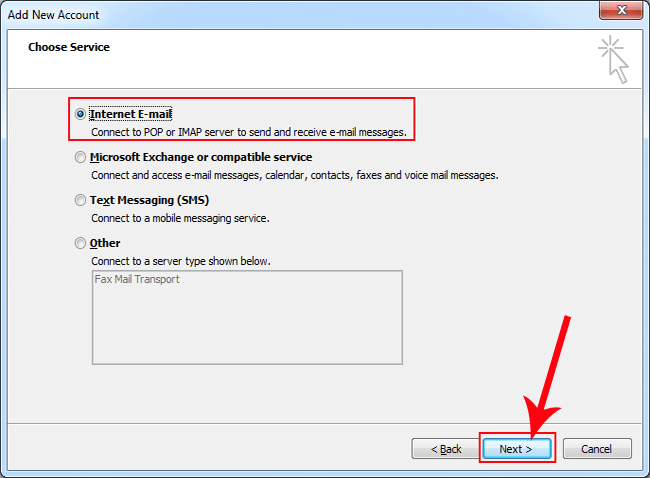
Step 4
- Here fill in all information like “User Information“, “Server Information“, “Logon information” and after that click on the “More Settings” button.
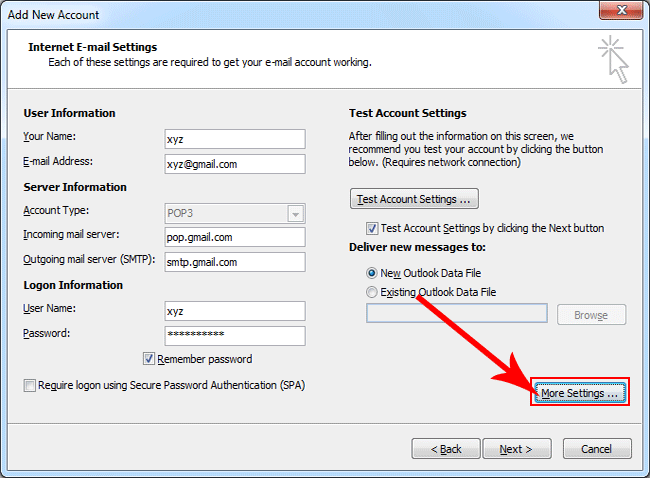
Step 5
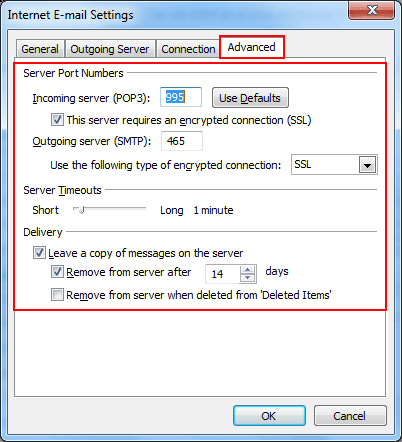
- When you click on the “more settings” button then a window pop up here like this and here users need to go on the “advanced” tab and fill in all information like Incoming server Port number, Outgoing server no. these server port number only for Gmail mail service.
Step 6
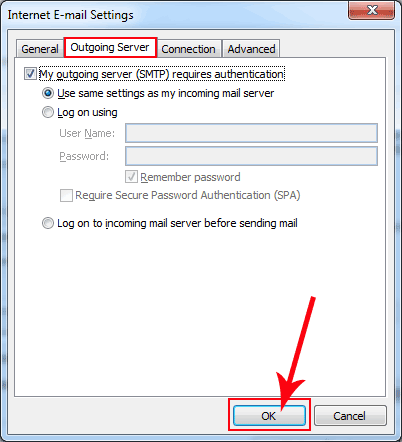
- After filling in all information select the “Outgoing server” tab and select the “first option“. Furthermore, click the “OK” button to save and close.
Step 7
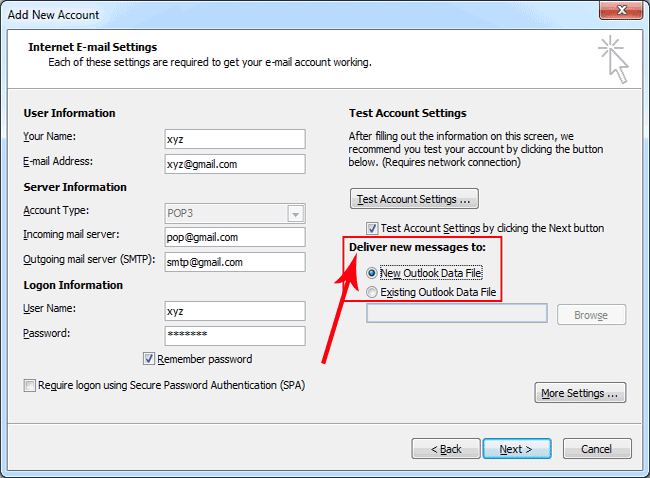
- Here users have choices to save the new message in “New Outlook PST file” and “Existing Outlook PST file“.
Step 8
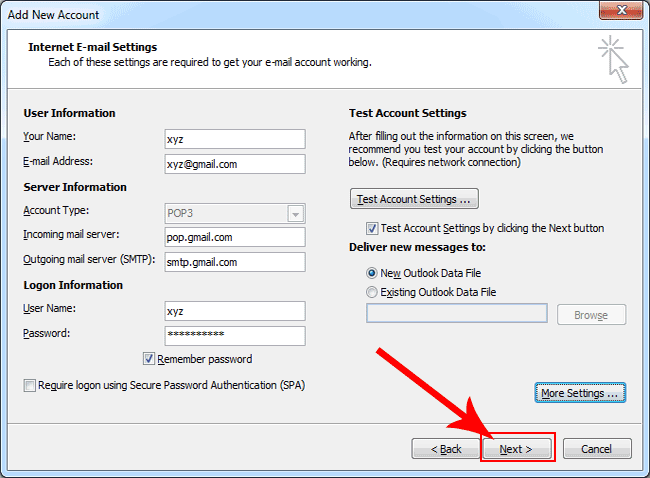
- After that click on the “Next” button to test account settings.
Step 9
- When the account testing process is completed then you will click on the “close” button.
Step 10
- At last, after clicking the close button this screen will open here and click on the “Finish” button and the POP3 account successfully added to MS Outlook 2010.
How to Transfer Email Data from IMAP Account to POP3 Account
After adding a pop3 account you will download emails Inbox folder from the mail server, but not download sent items and Outbox data. To get outbox, draft, and sent items data you have a need to transfer folders from IMAP account to POP3 account. You will simply transfer emails data from IMAP to POP3 account with the help of dragon drop in all MS Outlook versions. After that users need to remove their IMAP account from MS Outlook.
Instant Fix: Read this article if you want to Change POP3 to IMAP Account.
How to Remove IMAP account from Outlook?
Different steps in different Outlook versions to remove IMAP account from MS Outlook. Here are described steps for MS Outlook 2007 and 2010.
Remove IMAP account from MS Outlook 2007
Step 1
- Click on the “Tools” Tab and click on “Account Settings“.
Step 2
- After Clicking the Account Settings open this screen and select your “IMAP account” and after that click on the “Remove” button to remove the IMAP account.
Remove IMAP account from MS Outlook 2010
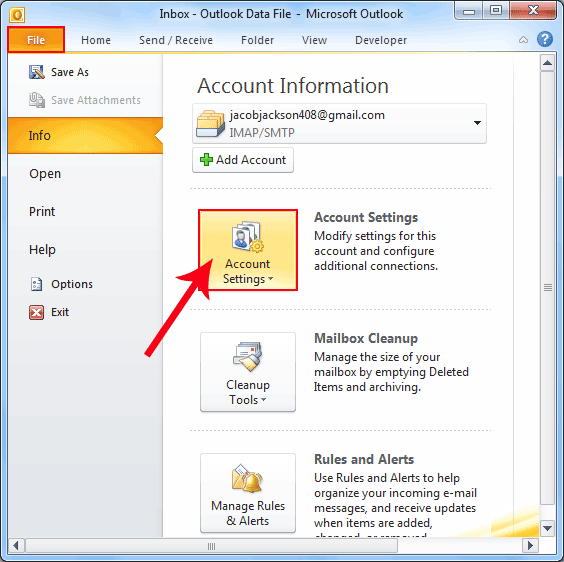
Step 1
- Firstly, click on “File Tab” and after that Click on “Account Settings“:
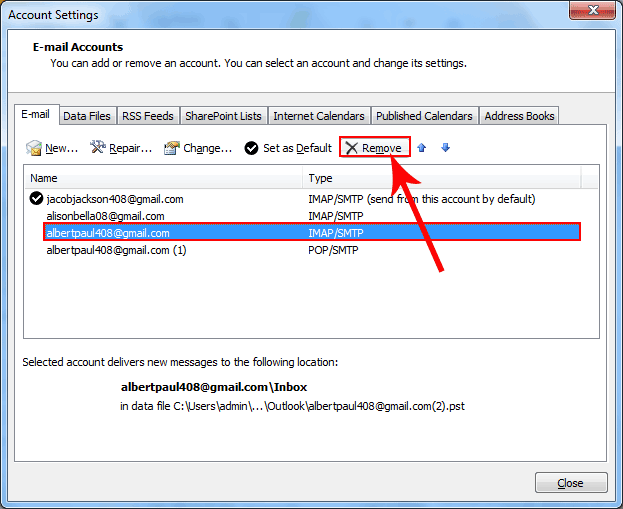
Step 2
- Secondly, select your “IMAP account” and click on the “Remove” button to remove the IMAP account.
In Conclusion
In the above-mentioned blog, we have explained a complete solution to convert IMAP to POP3 account. Also, we have discussed the ways using which one can add POP3 emails in Outlook and the ways to transfer email data from IMAP account to POP3 account.

