How to Add New Colorful Smiley, Logos in Outlook Emails?
Think about a Smiley face in Outlook email, it’s splendid for Outlook users and might be renounced interesting for professional users as well. Usually, users type the emoticons and Outlook automatically converts them to the predefined colorful smiley face. As Outlook doesn’t permit native support for colorful and custom smileys, it is easy to set it through the Autocorrect feature.
Configuring colorful and custom smiley face in Outlook through the Autocorrect feature is really easy. This feature improves the design of mail by making it eye-catchy. One can change or replace the default smiley in OUtlook using the Autocorrect feature.
Add New Colorful Smiley Logos or icons in Outlook
If due to any reason you were not able to recover the navigation pane configuration file, then try to delete the XML file that stores the navigation pane settings.
Quick Tip: If you are an Outlook user and finding it difficult to recover corrupted Outlook PST files then, download the software below.
Step 1:
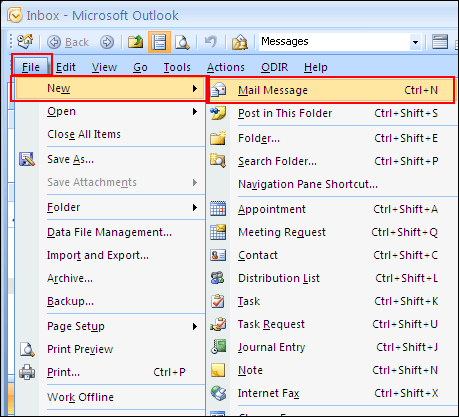
- Start “Outlook” and click on the “File” tab.
- Select “New” and After that “Mail Message”.
Step 2:
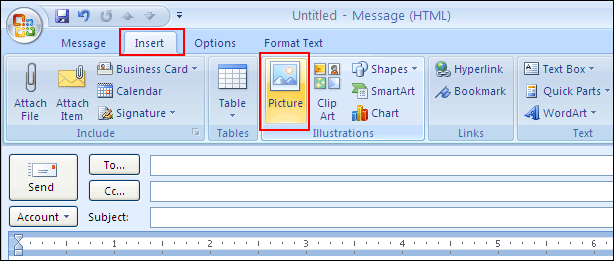
- “Insert image or symbol” of your choice either from “disk or from web”.
- Click on “Insert” and then “Picture”.
Step 3:
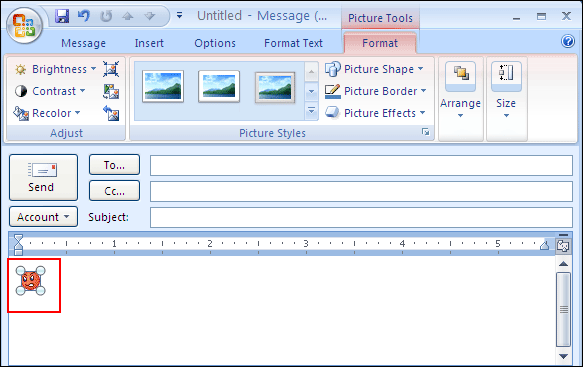
- Select the “Inserted Image” or “Symbol”.
Step 4:
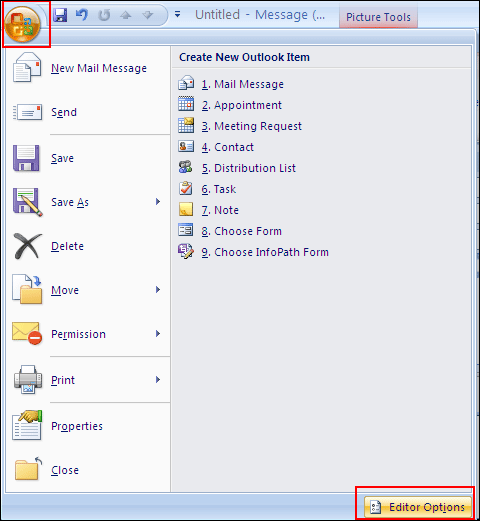
- Click on “Office logo” at the top “left-hand corner”.
- Then click on “Editor Options”.
Step 5:
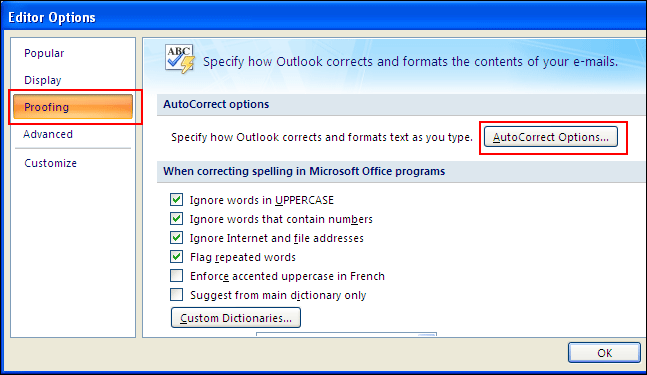
- Now a new window opens on your screen “select Proofing Option” is available in the left-hand corner.
- And after that click on “AutoCorrect Options”.
Step 6:
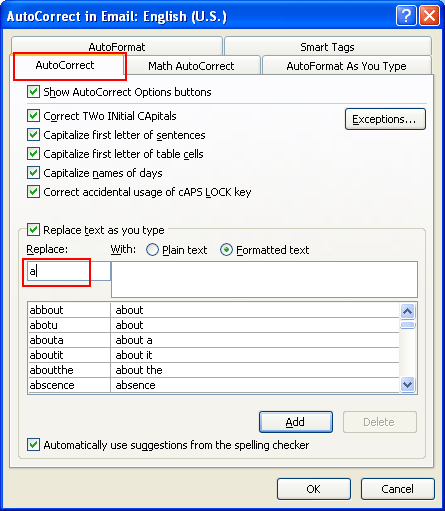
- “Select Autocorrect” tab type your characters that should “convert into image” in Replace field supposed to take a.
Step 7:
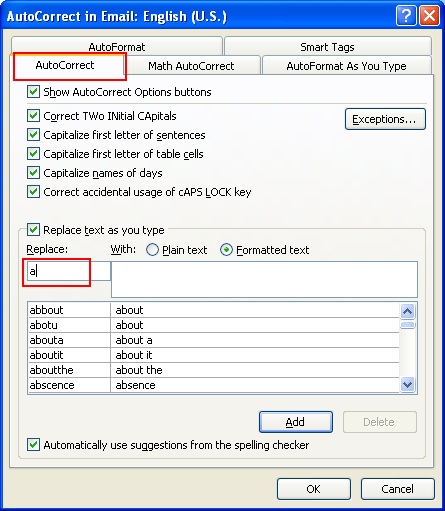
- Verify that the With Option is set to “Formatted text otherwise” you may not see the image in box below it.
- Click on the “Add or Replace” button.
- In the list below, you’ll now see an entry for your typed characters. The asterisk (*) indicates that it will be replaced with an image.
- At last, press “Ok”.
Step 8:
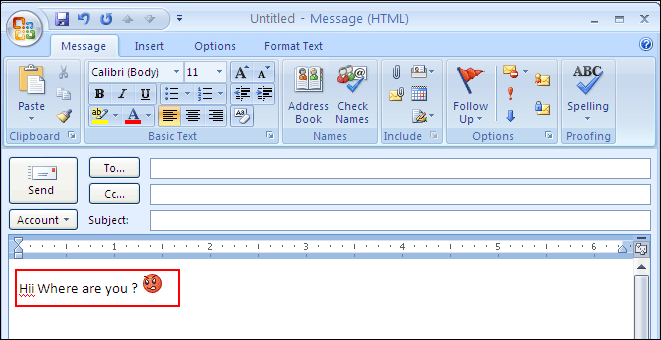
- Write “body text” to your message then, “write and press enter”.
- You will get the smiley which you want.
Easy Access to AutoCorrect Options
When setting up a colorful smiley, quicker access to AutoCorrect Options in Outlook 2007 and 2010 might be handy. So, for this add a command to Quick Access Toolbar.
The Final Verdict
In the above blog, we have mentioned the ways how to add a colorful smiley, logo while sending Outlook emails.

