Get Delivery and Read Receipt Confirmation to a Specific Address
“Is there a way to get the delivery & read receipts confirmation to a specific address in Outlook? I know one can easily perform this for the individual message. But, I want to get the way to automatically turn it on for specific email address whenever I send a message.” – Milan
Get Delivery & Read Receipts Confirmation to a Specific Address
A delivery receipt informs that your email message gets delivered to the recipient’s mailbox, but not the recipient has read it. The read receipt informs you that the message opens. But in the case of read receipts, you should know one thing, the message recipient (in Outlook) has the power to decline to send a read receipt. There can be one scenario more when the recipient’s e-mail program does not support read receipts. So, don’t rely only on this option.
However, I am going to explain the procedure for getting delivery and read receipt confirmation to a specific address in Microsoft Outlook.
Due to any reason, you were not able to recover the navigation pane configuration file, and then try to delete the XML file that stores the navigation pane settings.
Step 1
- Apply a New Rule:
- Click on the “New Rule” option.
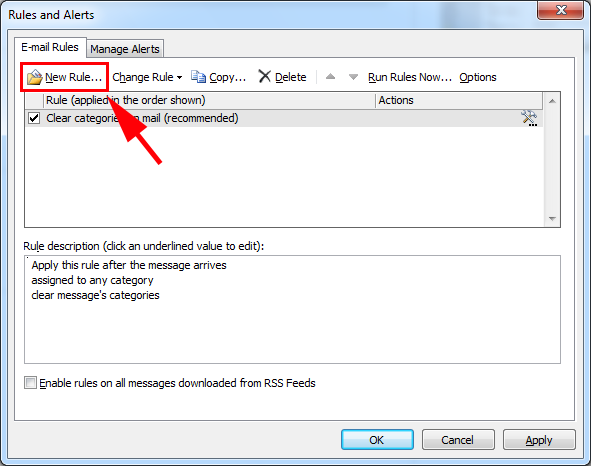
Select Template
Step 2
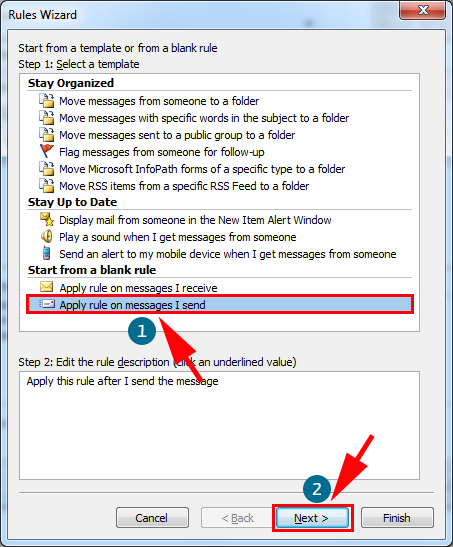
- Select the “Apply rule on message I send” template under the “Start from a blank rule” section.
[NOTE: In Outlook 2007 or previous versions, you will see “Check messages after sending”]
- Click on the “Next” option.
- Subsequently, select one or more conditions to check what you want.
Rules Wizard
Step 3
- For tracking specific messages (in our case), we need to select “sent to people or public group”.
[NOTE: In Outlook 2007 or previous version – you will see “sent to people or distribution list”]
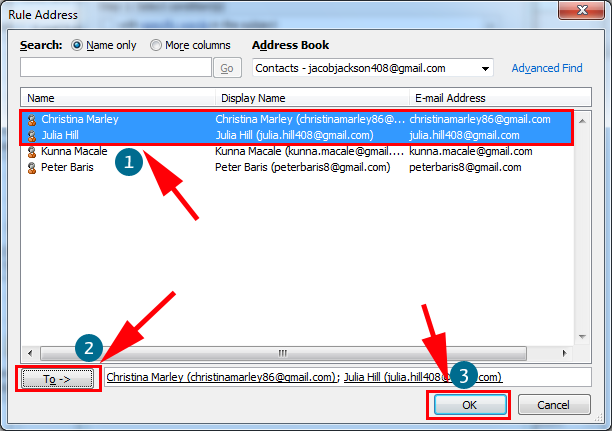
- Click “people or public group” on the bottom screen and select the contact(s) from Address Book that you want to track.
Rule Address
Step 4
- After selecting contacts, click on the “Ok” button.
- Now, Click on the “Next” button to go to the next step.
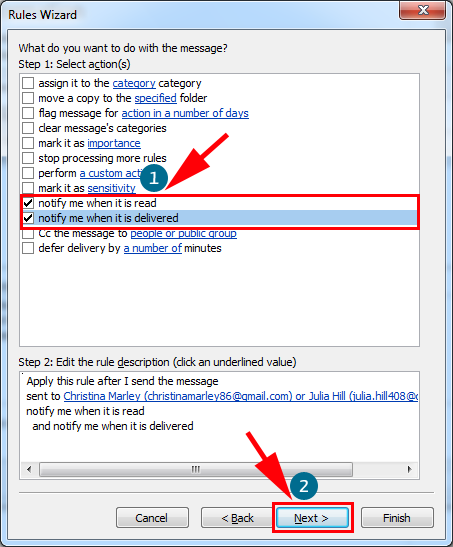
- Select action(s) according to need
Step 5
- In our case, we need to select “notify me when it is read” and “notify me when it is delivered”.
- Click on the “Next” button.
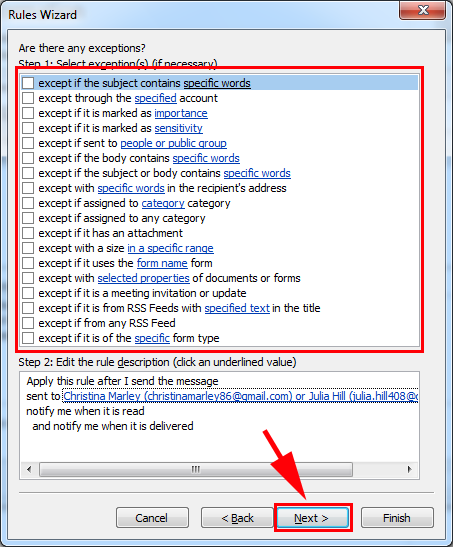
- Then, if there is a need to set an exception, click on the required exception or leave it blank.
Step 6
- Now, click on the “Next” button.
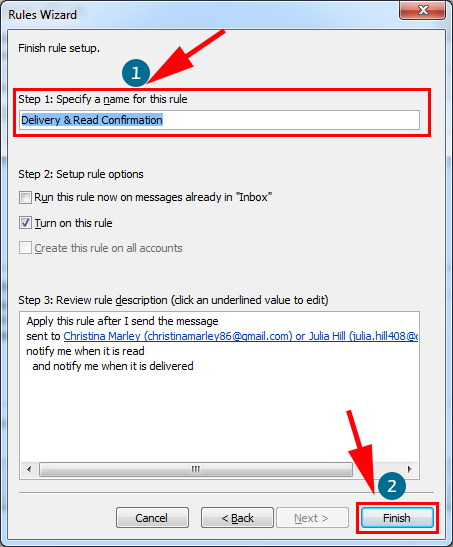
- Give a name to the rule.
Step 7
- Click on the “Finish” button.
- If you want to track all Sent messages of Outlook by default, then enable the Delivery and Read Receipt confirmation option.
For Outlook 2002, 2003, and 2007:
Step 1
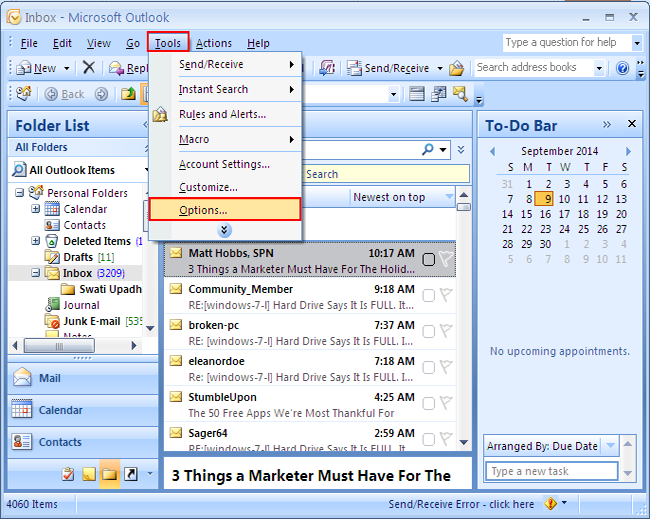
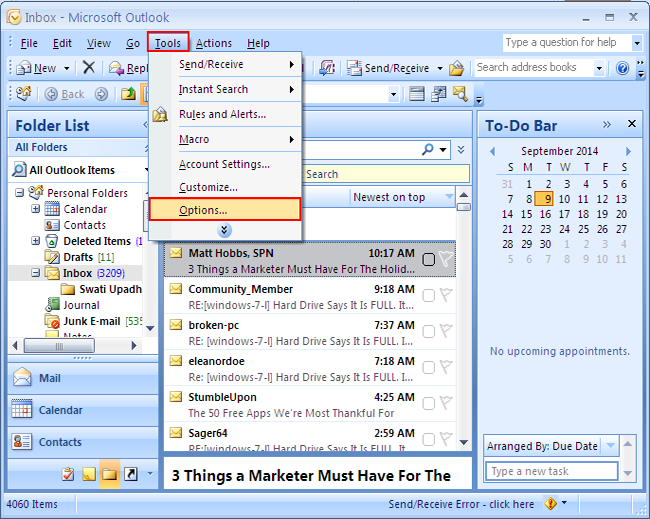
- Go to the “Tool” menu and click on “Options”.
Step 2
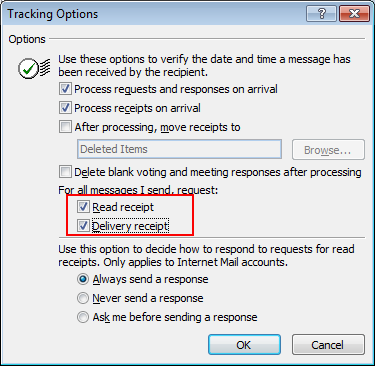
- On the “Preference” tab, click on “E-mail Options” under E-mail and then click on “Tracking option”.
Step 3
- Now, checkmark on “Read Receipt” and “Delivery Receipt” under “For all messages I send, request”.
If you are having trouble while working on a corrupted file, then recover multiple PST files from Outlook by clicking on the below link:
For Outlook 2010 and 2013:
Step 1
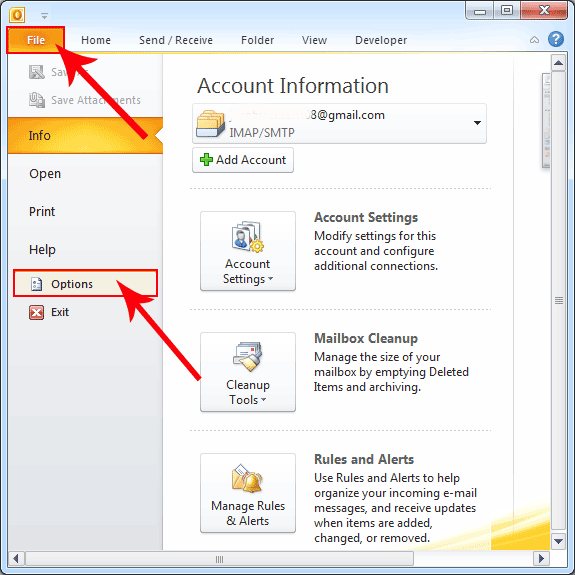
- Firstly, go to File >> Option >> Mail
Step 2
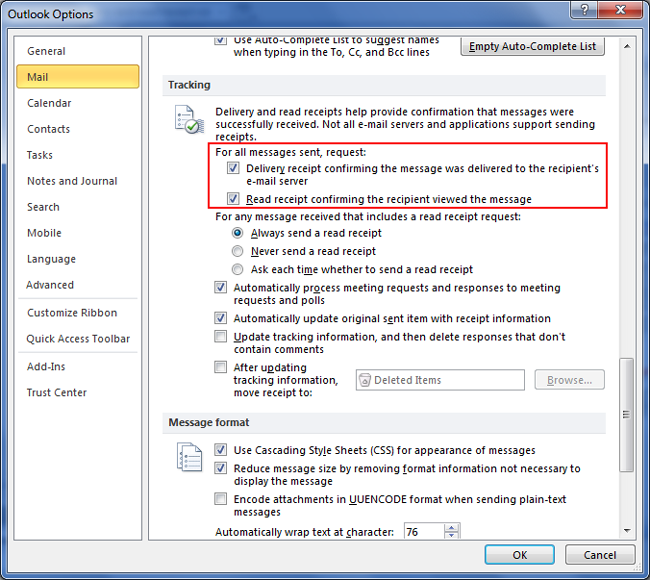
- Secondly, under the tracking option, checkmark the box “Delivery receipt confirming the message was delivered to recipient email server”.
Thus, by applying these settings, you will be able to get confirmation as you want. But, keep in mind that the recipient has the power to decline to send a read receipt as I have already mentioned above.
If you still have any questions, please feel free to contact us.

