How to Import Mailing / Contact List from Excel Sheets to Outlook?
Summary: If you contain a list of contacts in Microsoft Excel spreadsheet and want to access it through Microsoft Outlook or to another application that may access Address Book. Then use an Import feature. To organize your imported contacts effectively, you may want to check out this guide on how to sort out list in Outlook.
To Import Excel File in Outlook First Export It into CSV Format
- Open Excel Files that contain a mailing list and save it into CSV format.
- OR Right click on the excel file and choose the Rename option.
- Change the extension of the excel file from .xlsx to .csv.
Import Contact list into Outlook 2003 & 2007
Here are the information to import contact list in Outlook. know about this in below steps:
Step 1. If you are importing contacts into an existing folder then skip step 3. To create a few folders in Outlook, click the Folder list on the view menu, unless the Folder list is open already.

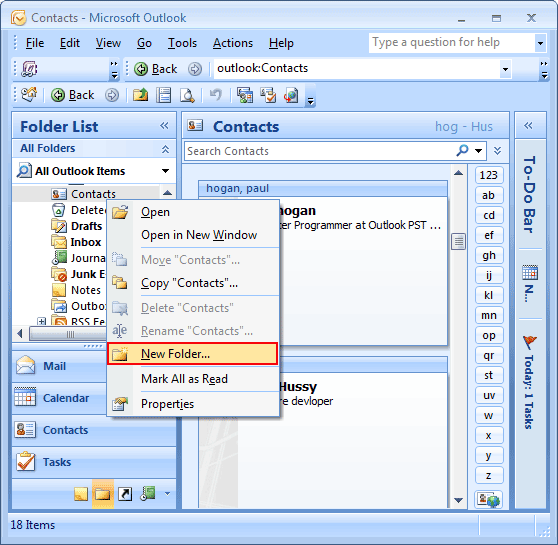
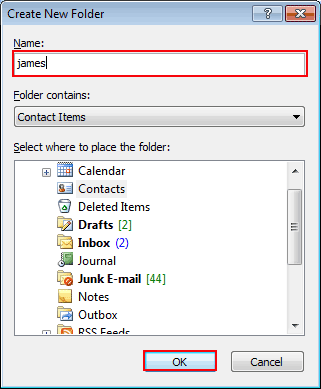
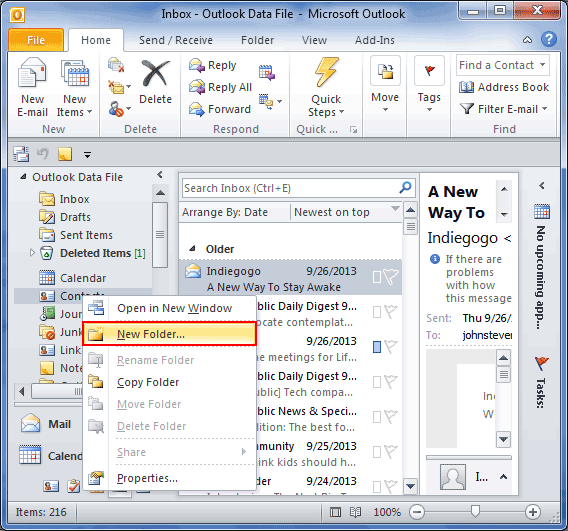
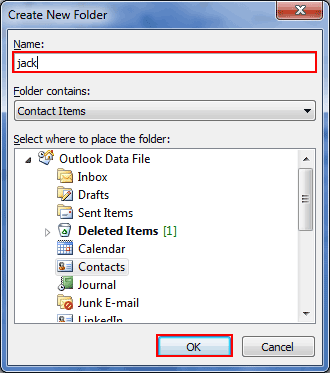
Step 2. Right click on Contact folder and then click New Folder, type name for new folder and then click Ok.
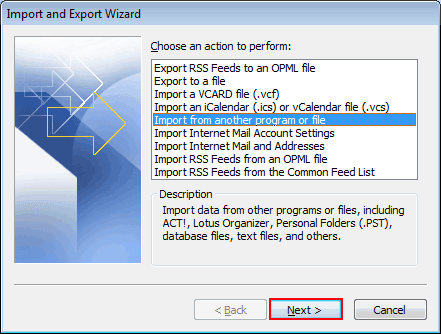
Step 3. On the “File” menu, click “Import and Export” >> “Next” >> “Comma Separated Values” >> “Next“.

Step 4. Click on the “Browse” button to select the file.
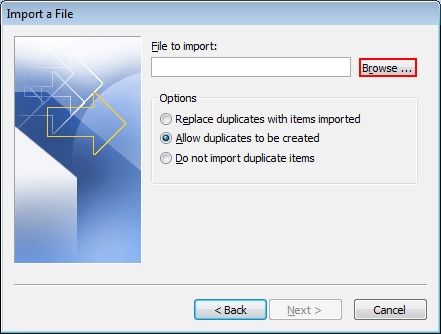
Step 5. Select the “File” and Click on the “OK” button.

Step 6. If the file has been imported in the new folder, then the option setting is unnecessary as there are no duplicates, If not select the logical selection. Check the Allow duplicates box if you are not assured and click Next.
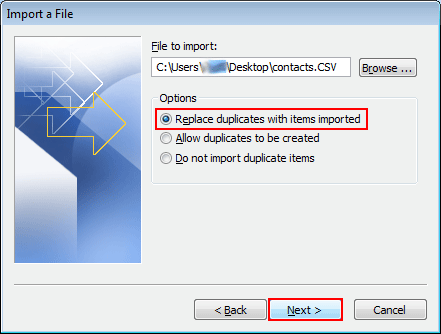
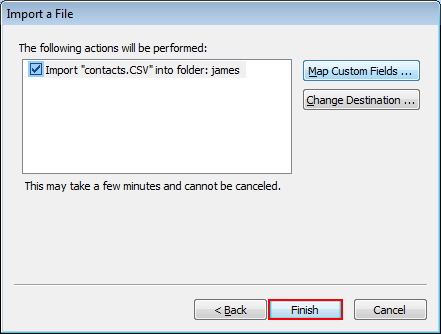
Step 7. If it is found that the column name in the first row of the spreadsheet was not correctly to Outlook fields, then click “Map custom field” to verify.
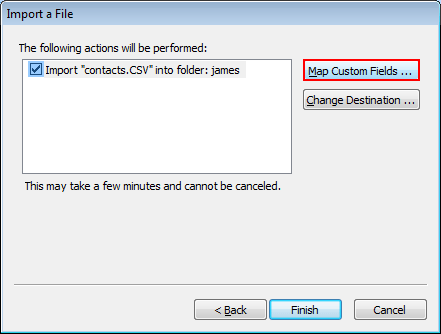
Step 8.
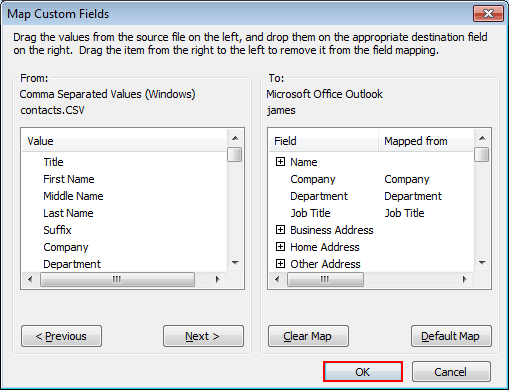
Note: If the Map custom field is not unavailable, you can choose a non contact type folder to import into. Click Back then select the correct folder. If it is not satisfied with mapping, click Ok to close the “Map Custom Field” dialog box and click “Finish“.
Note: If you want to send a particular email to a set of contacts than create a Distribution list by following the given below steps:
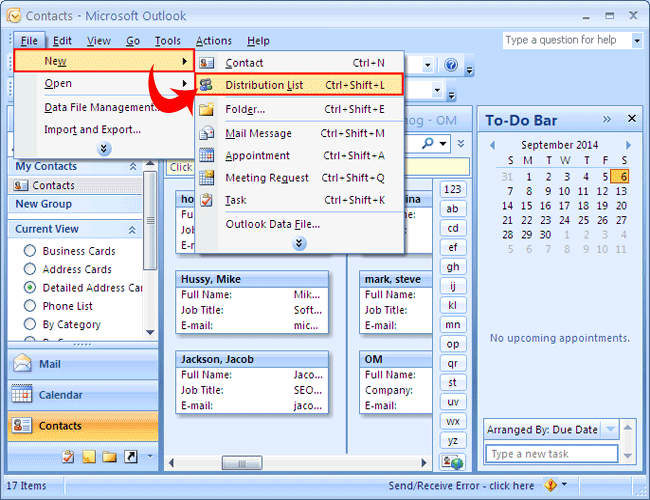
Step 1. Go to the “File” menu, select “New“, then “Distribution List“.
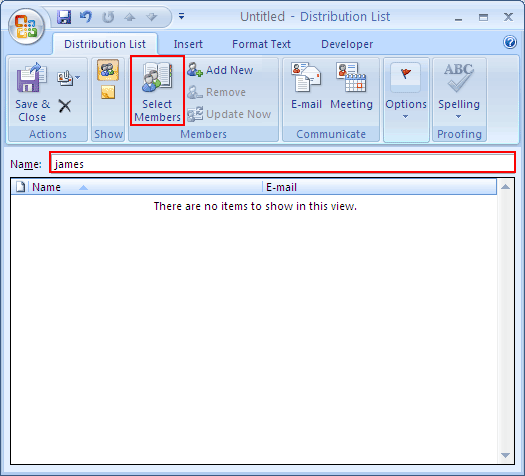
Step 2. Create a “name” for the list, then click the “Select Members” button.
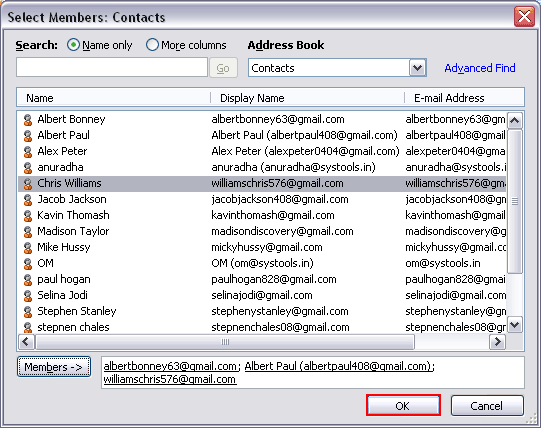
Step 3. Now select the Member list and click on Ok.
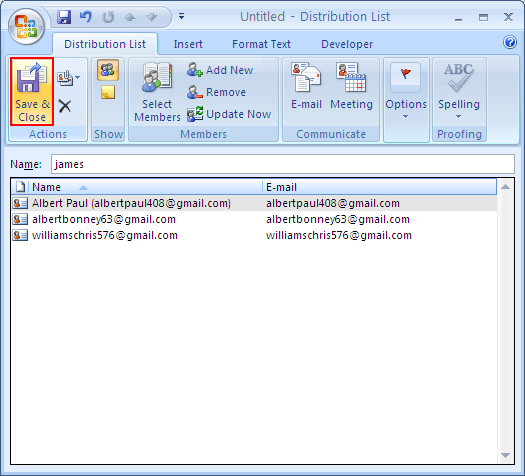
Step 4. After “selecting a member list“, click on the “save and close” button to save the distribution list.
Import Contact list into Outlook 2010 & 2013
Step 1.
- Create a new folder in MS Outlook 2010.
- “Right click” on the Contact folder, then “New Folder“, type a name for “new folder” and then click “OK“.
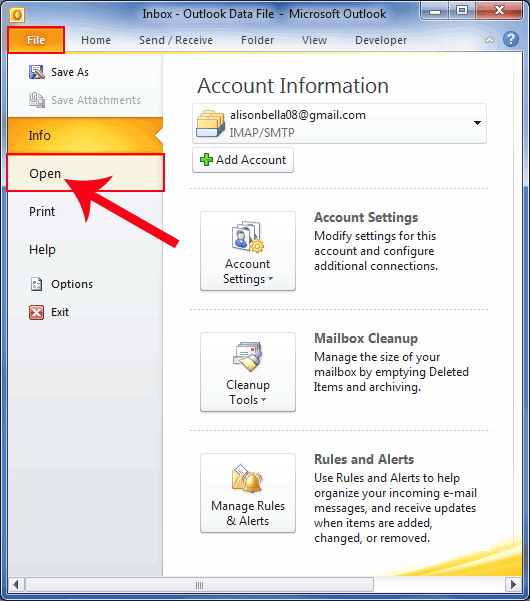
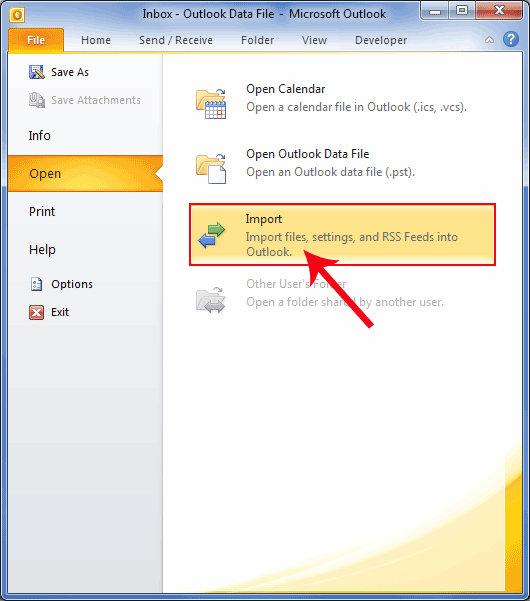
Step 2. Now click on the “File” tab in Ribbon, and then “Open” on the menu.
Step 3. Click “Import” tab, “Import and Export Wizard” opens>>”Import to a file” >> “Next” >> “Comma Separated Values” >> “Next“.

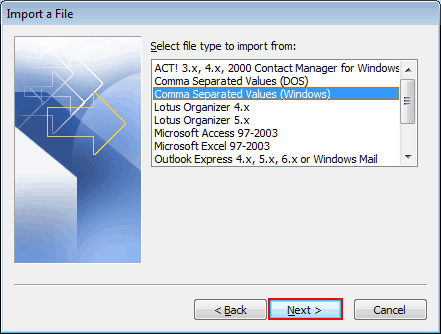
Step 4. Click on the “browse” button to select the file.

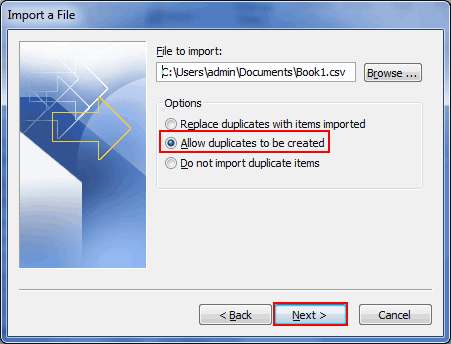
Step 5. If the contacts have been imported into a new folder, then the Option setting is unnecessary as there are no duplicates. If you are importing contacts into an existing folder then select the logical selection, Click on “Allow duplicates” if not assured, and click “Next“.
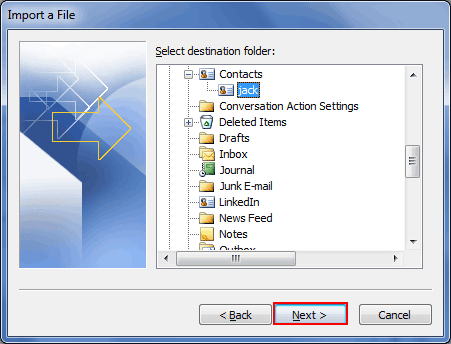
Step 6. Click the “Contacts folder” that you have created and then “Next“.
Step 7. If you are assured that the column name in the first row of the spreadsheet will map correctly to the Outlook field, then click “Map custom field” to verify.
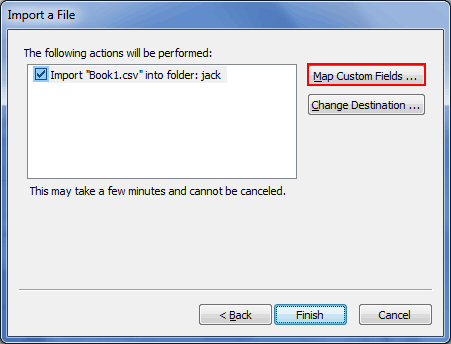
Step 8. Drag the information from the “Left to Right” panel according to the desire from the incoming file to Outlook and then click “OK“.
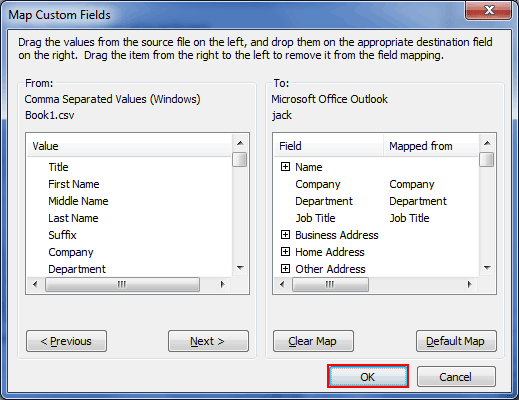
Step 9. Click the “Finish” button.
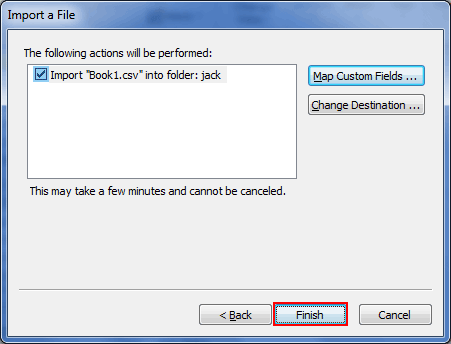
Step 1. Go to the “Home” tab and click on the “new Contact group“.
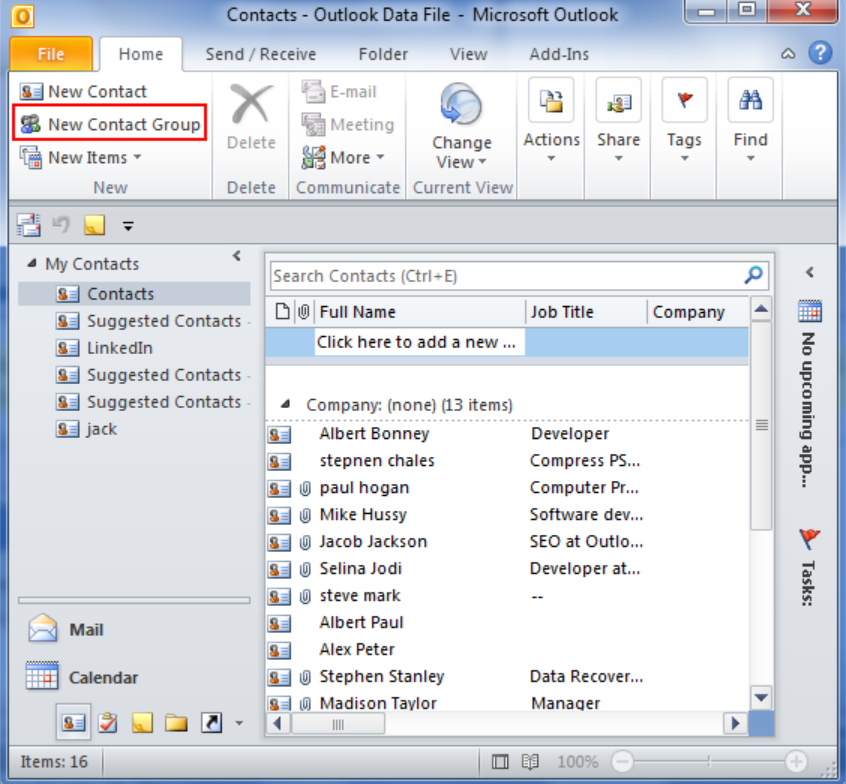
Step 2. “Add a name” and after that click on “add members button” to add members in the newly created group.
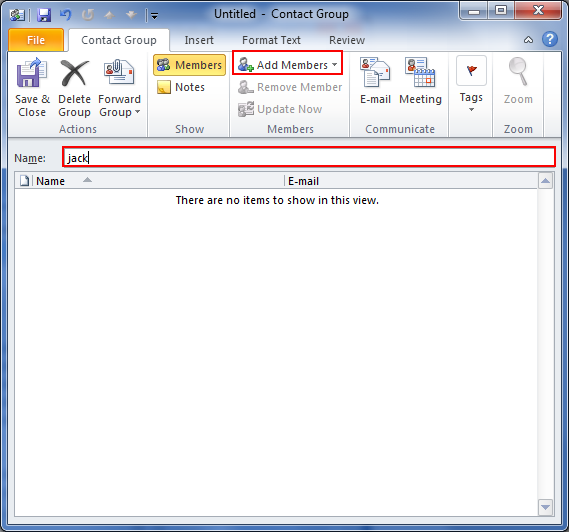
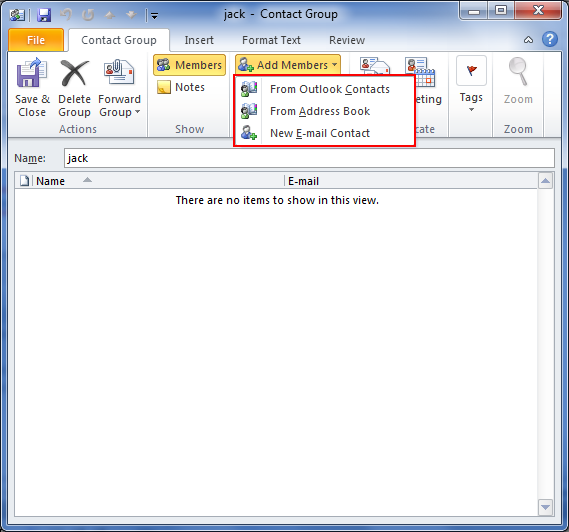
Step 3. After clicking on the add members button you will get three options: “From Outlook Contacts“, “From Address Book“, “New Email Account“.
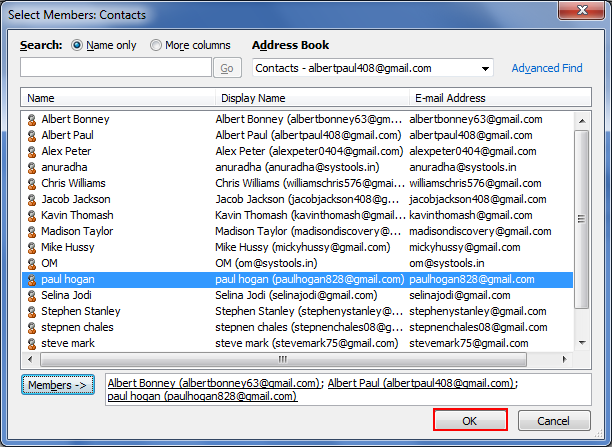
Step 4. Now select the “1st option” and “double click on contact” which you want to add in the group and after that click the “OK” button.
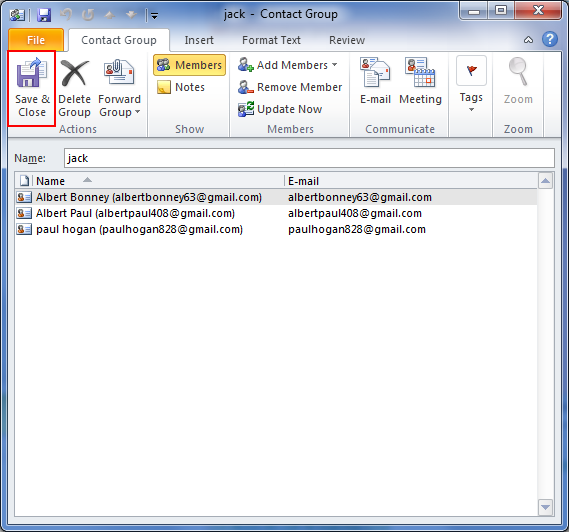
Step 5. Now click on the “Save and Close” button to save the group.
