How To Create Business Card In Microsoft Outlook?
Contact information is handled automatically by most email clients. Outlook 2010, Hotmail, Gmail, Windows Live Mail, and the rest impel to auto-populate contact detail on the sender’s information. If you want a bit of control over how your contact detail shows up in recipient address books, your best approach is to create business card signature with Outlook.
With Outlook business card signature, your contact information is conveyed along with email in a well-kept manner that populates address book contacts more completely. Plus, they accord a professional look to your business email.
Create an Outlook Contact for yourself
Step 1
- Open Microsoft Outlook 2010.
- Click on the contacts icon available in the bottom-most left-hand side panel.
![]()
Step 2
- After that click on “New contact” in Home Ribbon.
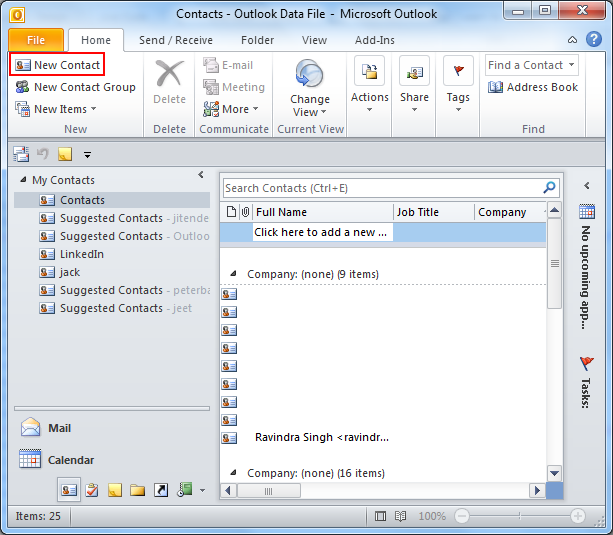
Step 3
- Fill in your contact information as you do so you will notice that information is mapped automatically onto the business card on the right-hand side.
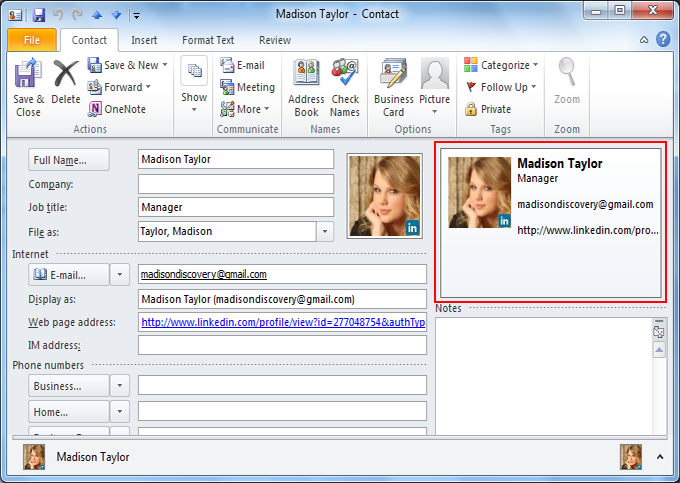
Don’t anguish about what is included and how it looks as it gets edited by following the simple steps.
Step 1
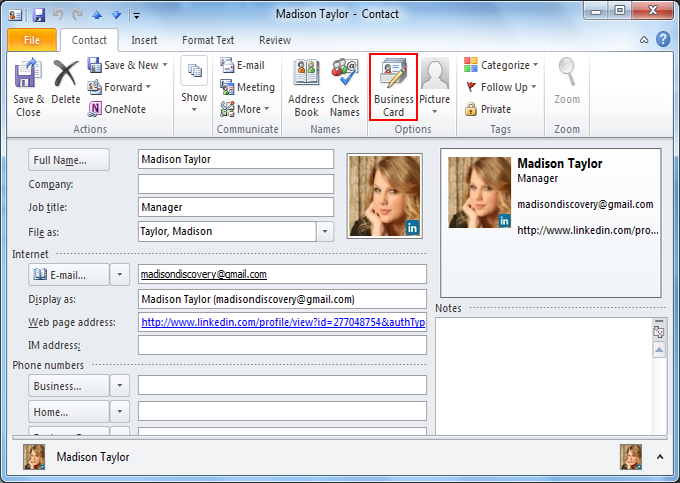
- Click on “Option” available in the menu then “Business card”.
Step 2
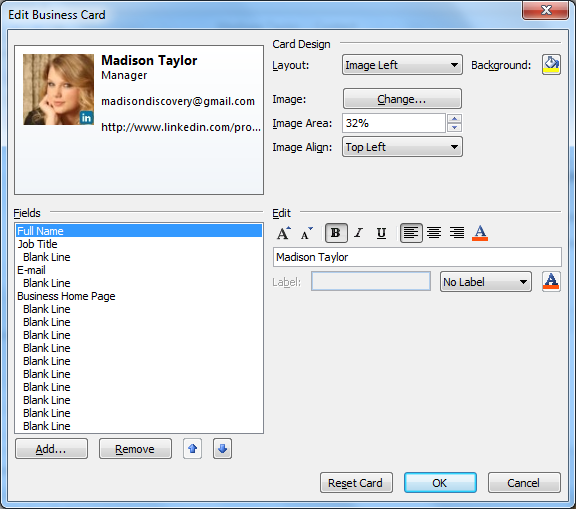
- This opens the Edit “Business Card window” from where you can “alert card design, re-order fields” etc. In the “top-left preview business card,” it appears in the signature.
Step 3
- Begin by “selecting the field you’d want to include” in the business card. You can also “re-order existing field” by selecting the field in the bottom left and clicking “Up or Down arrows”. Similarly “remove a field by selecting it” and clicking on “Remove”.
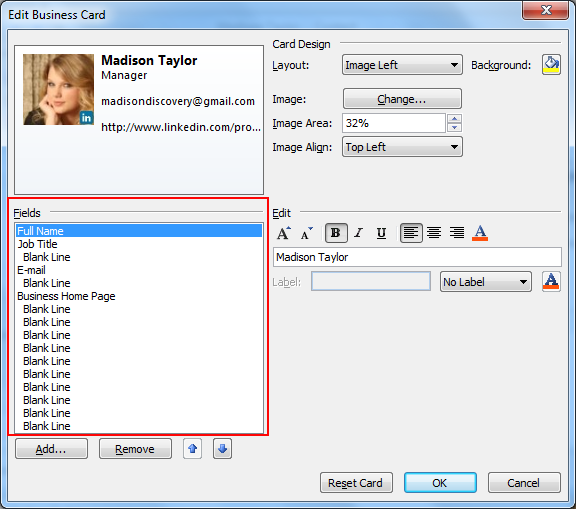
Note: This does not remove underlying information from contact, it simply excludes it from the business card.
Click Add to the add field and if it is already there then it will automatically consider the same. If not fill in the relevant details after you add them.
Further Readings:
- A complete MSG to PST Converter Wizard guide to perform batch conversion in easy steps.
Customize Format and Design of Outlook 2010 Business Card
After satisfying the information that appears on a business card, you can change the look of each file as well as the overall design of the business card.
Step 1
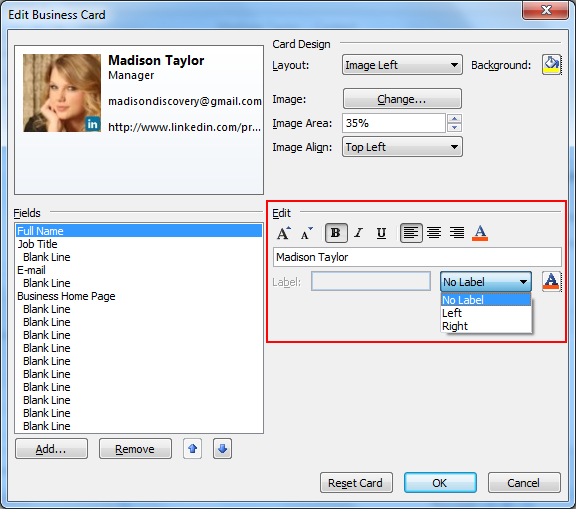
- Select “field to edit” after that “click on edit panel” on the right and change the field’s value like “text style, text alignment, and add a label” to create business card.
- “Label appears at the right or left of field”. To “remove existing label clear the label field” or “select no label” from the drop-down menu.
Step 2
- Choose a “background or logo for business card” by clicking on “change next to the image in the card design panel”. After that browse image, you’d like to.
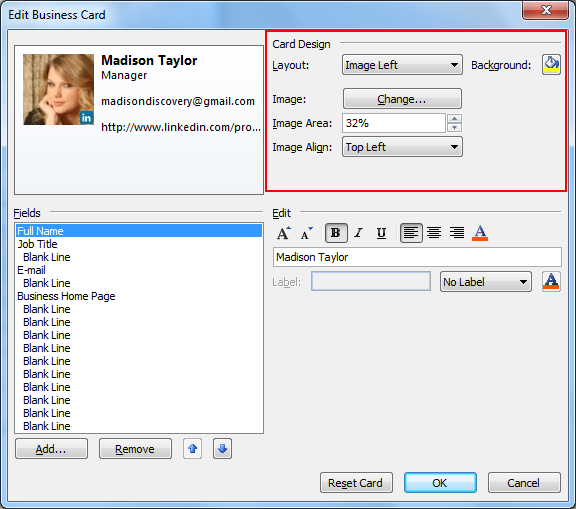
Position image using the Layout drop-down and the Image align drop-down menus. If you select a layout other than the background image, you can change the size of the image by altering the Image area percentage. You can add background color for a complete business card by clicking on the paint bucket.
Step 3
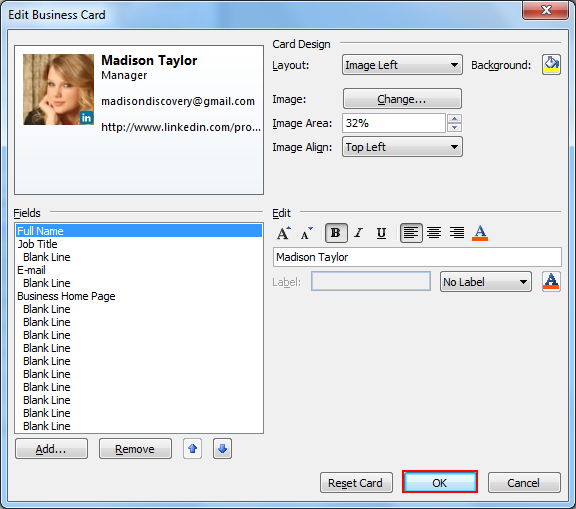
- Click on the “Ok” button when you have done the required changes after that click on “Save & Close”.
Save Contact Information from Business Card
When recipients receive a business card click the attachment to view how contact information will look in the address book. Then right-click on a business card and select Add to Outlook contacts to save contact info to their address book.
Importing vCard in Gmail is a bit inconvenient, as you have to download attachment .vcf to hard drive and then import it. Click on contacts and then on Import after choosing the file to save as .vcf.

